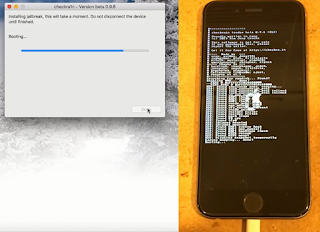
Hello and welcome back friends, I come back with another amazing post and today am going to show you how you can bypass iCloud activation using software or a tool in macOS called CHECKRA1N. So hope you going to enjoy this information.
Before diving into this process let me clear you something and my honest reviews. This method works only on old ios version 13 or lower and your device does not remain the same even after cracking iCloud and jailbreaking your device. Here is the list what you can't do and if you use any premium software to crack iCloud then still you face this problem.
- You can't make Calls/Text messages
- Not possible to use Cellular data
- Cannot factory reset, if you do then your device locked again
Requirements
- Checkra
- iOS 12.3-iOS 13.2.2. We recommend installing the latest iOS 13.2.2
- A computer running macOS. (Windows and Linux support are coming later)
- The latest version of iTunes is installed if using a Mac running anything prior to macOS Catalina.
- Python latest version installed on your system
- Homebrew
- Download the tools needed for the iCloud bypass from ApplTech752 or click here
Supported iOS Devices
- iPhone 5 to iPhone X
- iPad Mini 1 to iPad Mini 4
- iPad 2 to iPad 7
- iPad Air 2nd Generation
- iPad 5th Generation
- iPad Pro 1st Generation
- iPod Touch 5 to iPod Touch 7
- Apple TV 3 to Apple TV 4K
Once everything seems done you can proceed to our tutorial guide
Follow Given Tutorial
Installing Homebrew Now, to unlock iCloud, you need to download and install one more supportive tool called brew. Go to their official website and follow the commands given there on the website.
/usr/bin/ruby -e "$(curl -fsSL https://raw.githubusercontent.com/Homebrew/install/master/install)"
Installing usbmuxd using follow the commands
Install checkra1n in your macOS machine. Make sure you give full needed permissions.
Connect your compatible iPhone or iPad device computer via USB and launch checkra1n. You can see the status on checkra1n mobile connected.
Now click on the Start Button, we need DFU or recovery mood on mobileIn order to enter DFU mode hold the power button for three seconds then hold the home button until you see the screen turns black, then wait for about three seconds and then let go and. This should effectively put your device into DFU mode which checkra1n in loves and we'll use to exploit.
We're gonna just click on stat and this may not work the very first time if your device boots all the way up and checkra1n says failed or whatever. You'll just have to enter DFU mode again and try one more time.
During this, your device will show verbose log of jailbreak process. Just do not do anything with the device and your computer at this point and let it do its thing. After a successful jailbreak our device will be reboot automatically.
Now we need to connect our phone with proxy server Open Terminal Window and Type the following Command
After entering this command, you will see that the connection is establishing with your system. Now system is waiting for a connection so we will connect with SSH.
For connecting with SSH open a new Terminal and enter CMDs
ssh root@localhost -p 2222
Sometimes it asks for continuing yes or not. Hit enter type (Yes) for continue. It will be asked to enter the password, type in "alpine". Enter this password and hit Enter Button.
Now we have to mount our phone use following Command
mount -o rw,union,update /
After that, add one more command to the Terminal to the Terminal window given below.
Now we can unlock our phone here we can remove, move and rename setup.app
Here I'm renaming setup.app name using the following command
mv /Applications/Setup.app /Applications/Setup.app.xd
After that, add two more commands to the Terminal window given below.
This cmd will take a long time to execute after that use the final cmd given below.
Once you have successfully entered the above-given commands. You should see that your connected locked iOS device is respiring. You will be prompted with a normal home screen on your iOS device.
Congratulations iCloud Unlocking process is done successfully. You should now be able to use the locked iOS device. I hope this information is helpful, If you find something interesting on our website then do share and stay connected for future posts. Have a nice day.


